
Migrating existing templatesTemplates created before Apr 15th, 2026 need to be migrated to the new template experience by users with the template manager role. To do so, open the template overview and click "Migrate to new templates" next to each template to open the new editor view. Once you click "Migrate & Share", the template is migrated and immediately available to all users in the new experience. Please note:
|
Required user role to set up templatesPlease note that only users assigned the template manager role can create, edit, or delete templates within an organization. Learn more about role management in this article. |
Developing a good prompt
Before creating a template, ensure you have a prompt that consistently delivers good results. If you're not there yet, start by testing your prompt with Noxtua and refining it until the output consistently meets your standards across varying inputs. Time invested here pays off every time the template is used.
Learn more about best practices for legal prompting.
How to create a new template
Step 1: Create a new template
In the chat field, click "Templates" below the input field, then select "New Template" in the bottom-right corner of the window that opens.
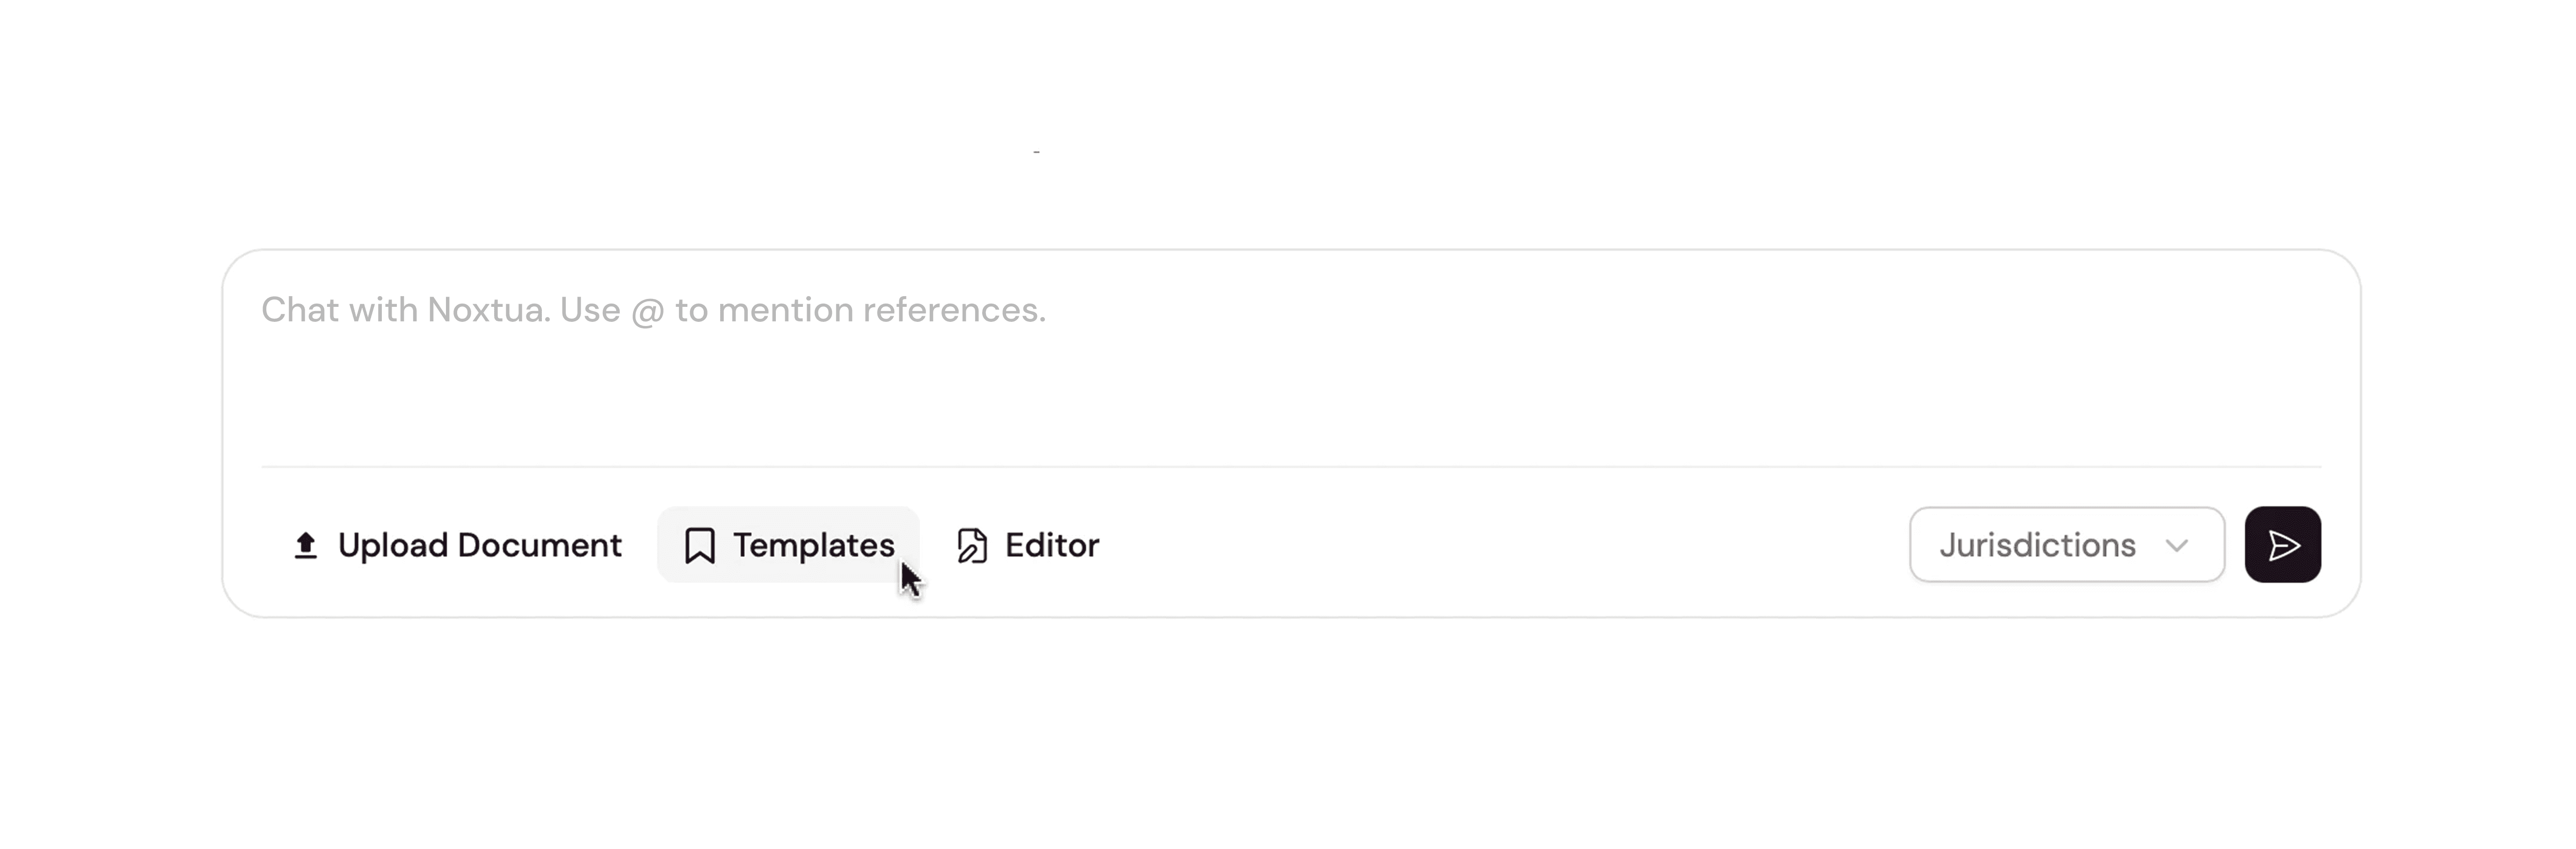
Step 2: Name your template and add a description
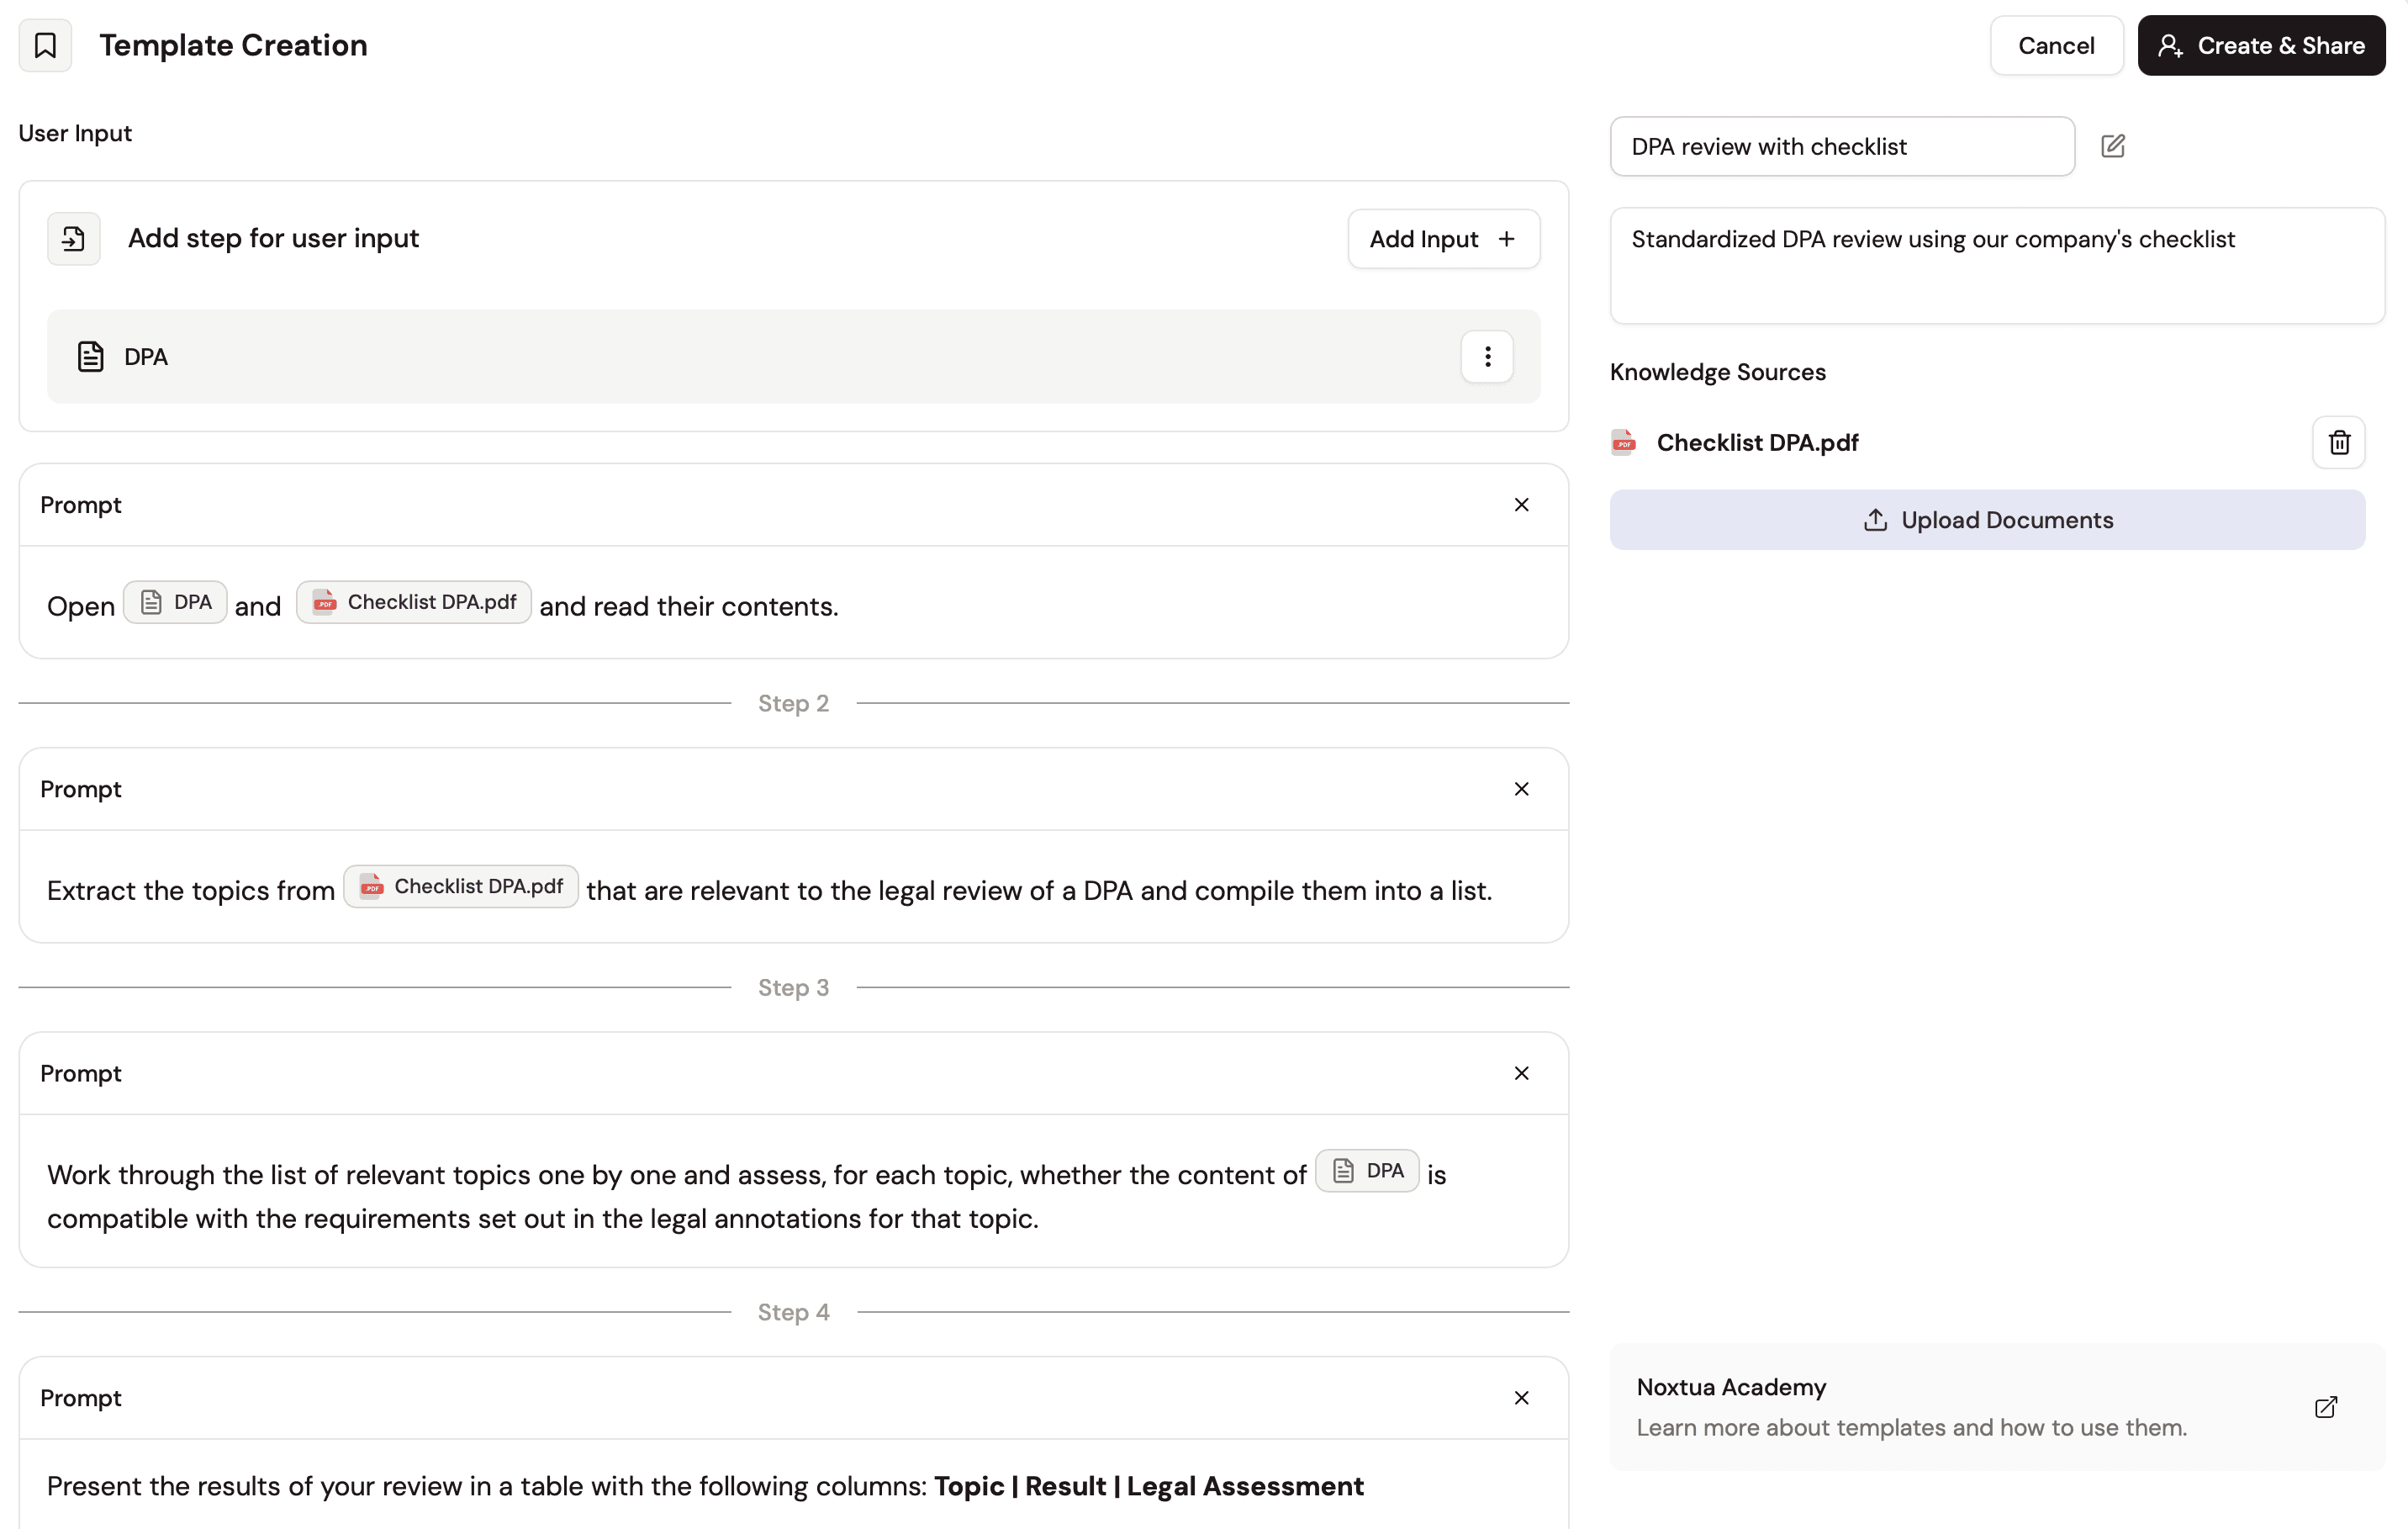
You are now on the overview page, where you can add all the information to design your new template.
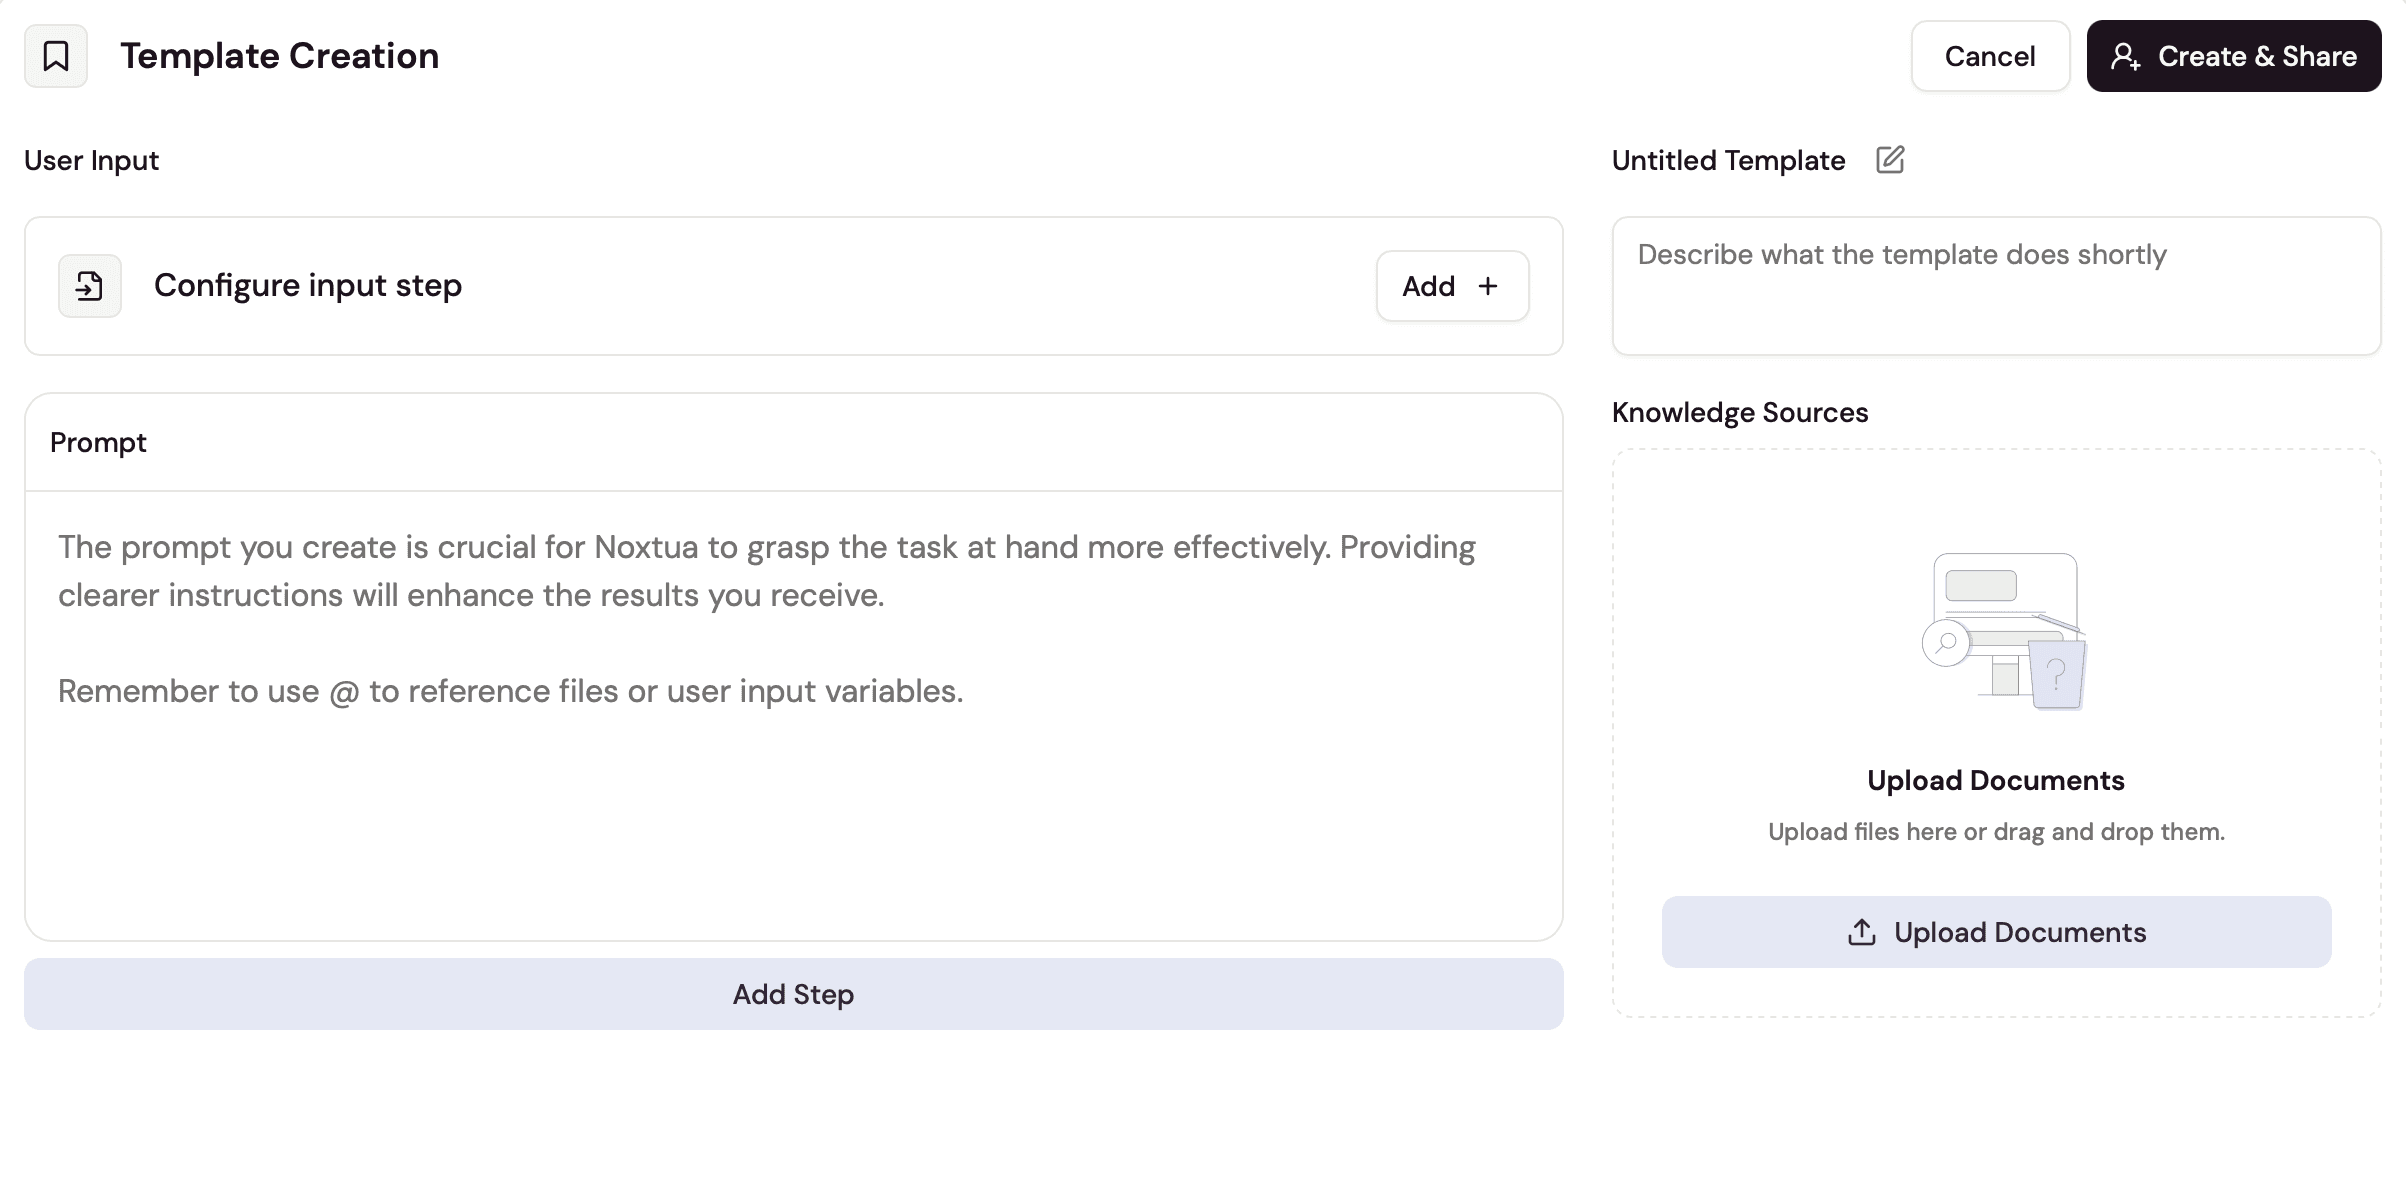
Start by giving your template a clear, descriptive name and add a short description that explains what the template does and when to use it. Both can be edited at the top right of the page.
Step 3: Define workflow steps
If the task your template is meant to solve involves multiple steps, you can break it into a sequence that forms a complete workflow. Noxtua supports up to five steps per template.
Before you start the first step, it helps to know how many steps your template will need and what each one should do. You can always add or remove steps later.
To add a new step, click “Add step” at the bottom of the screen.
Step 4: Add user input fields
If running the template requires specific information or documents from the user, you can define input fields that prompt the user to provide them.
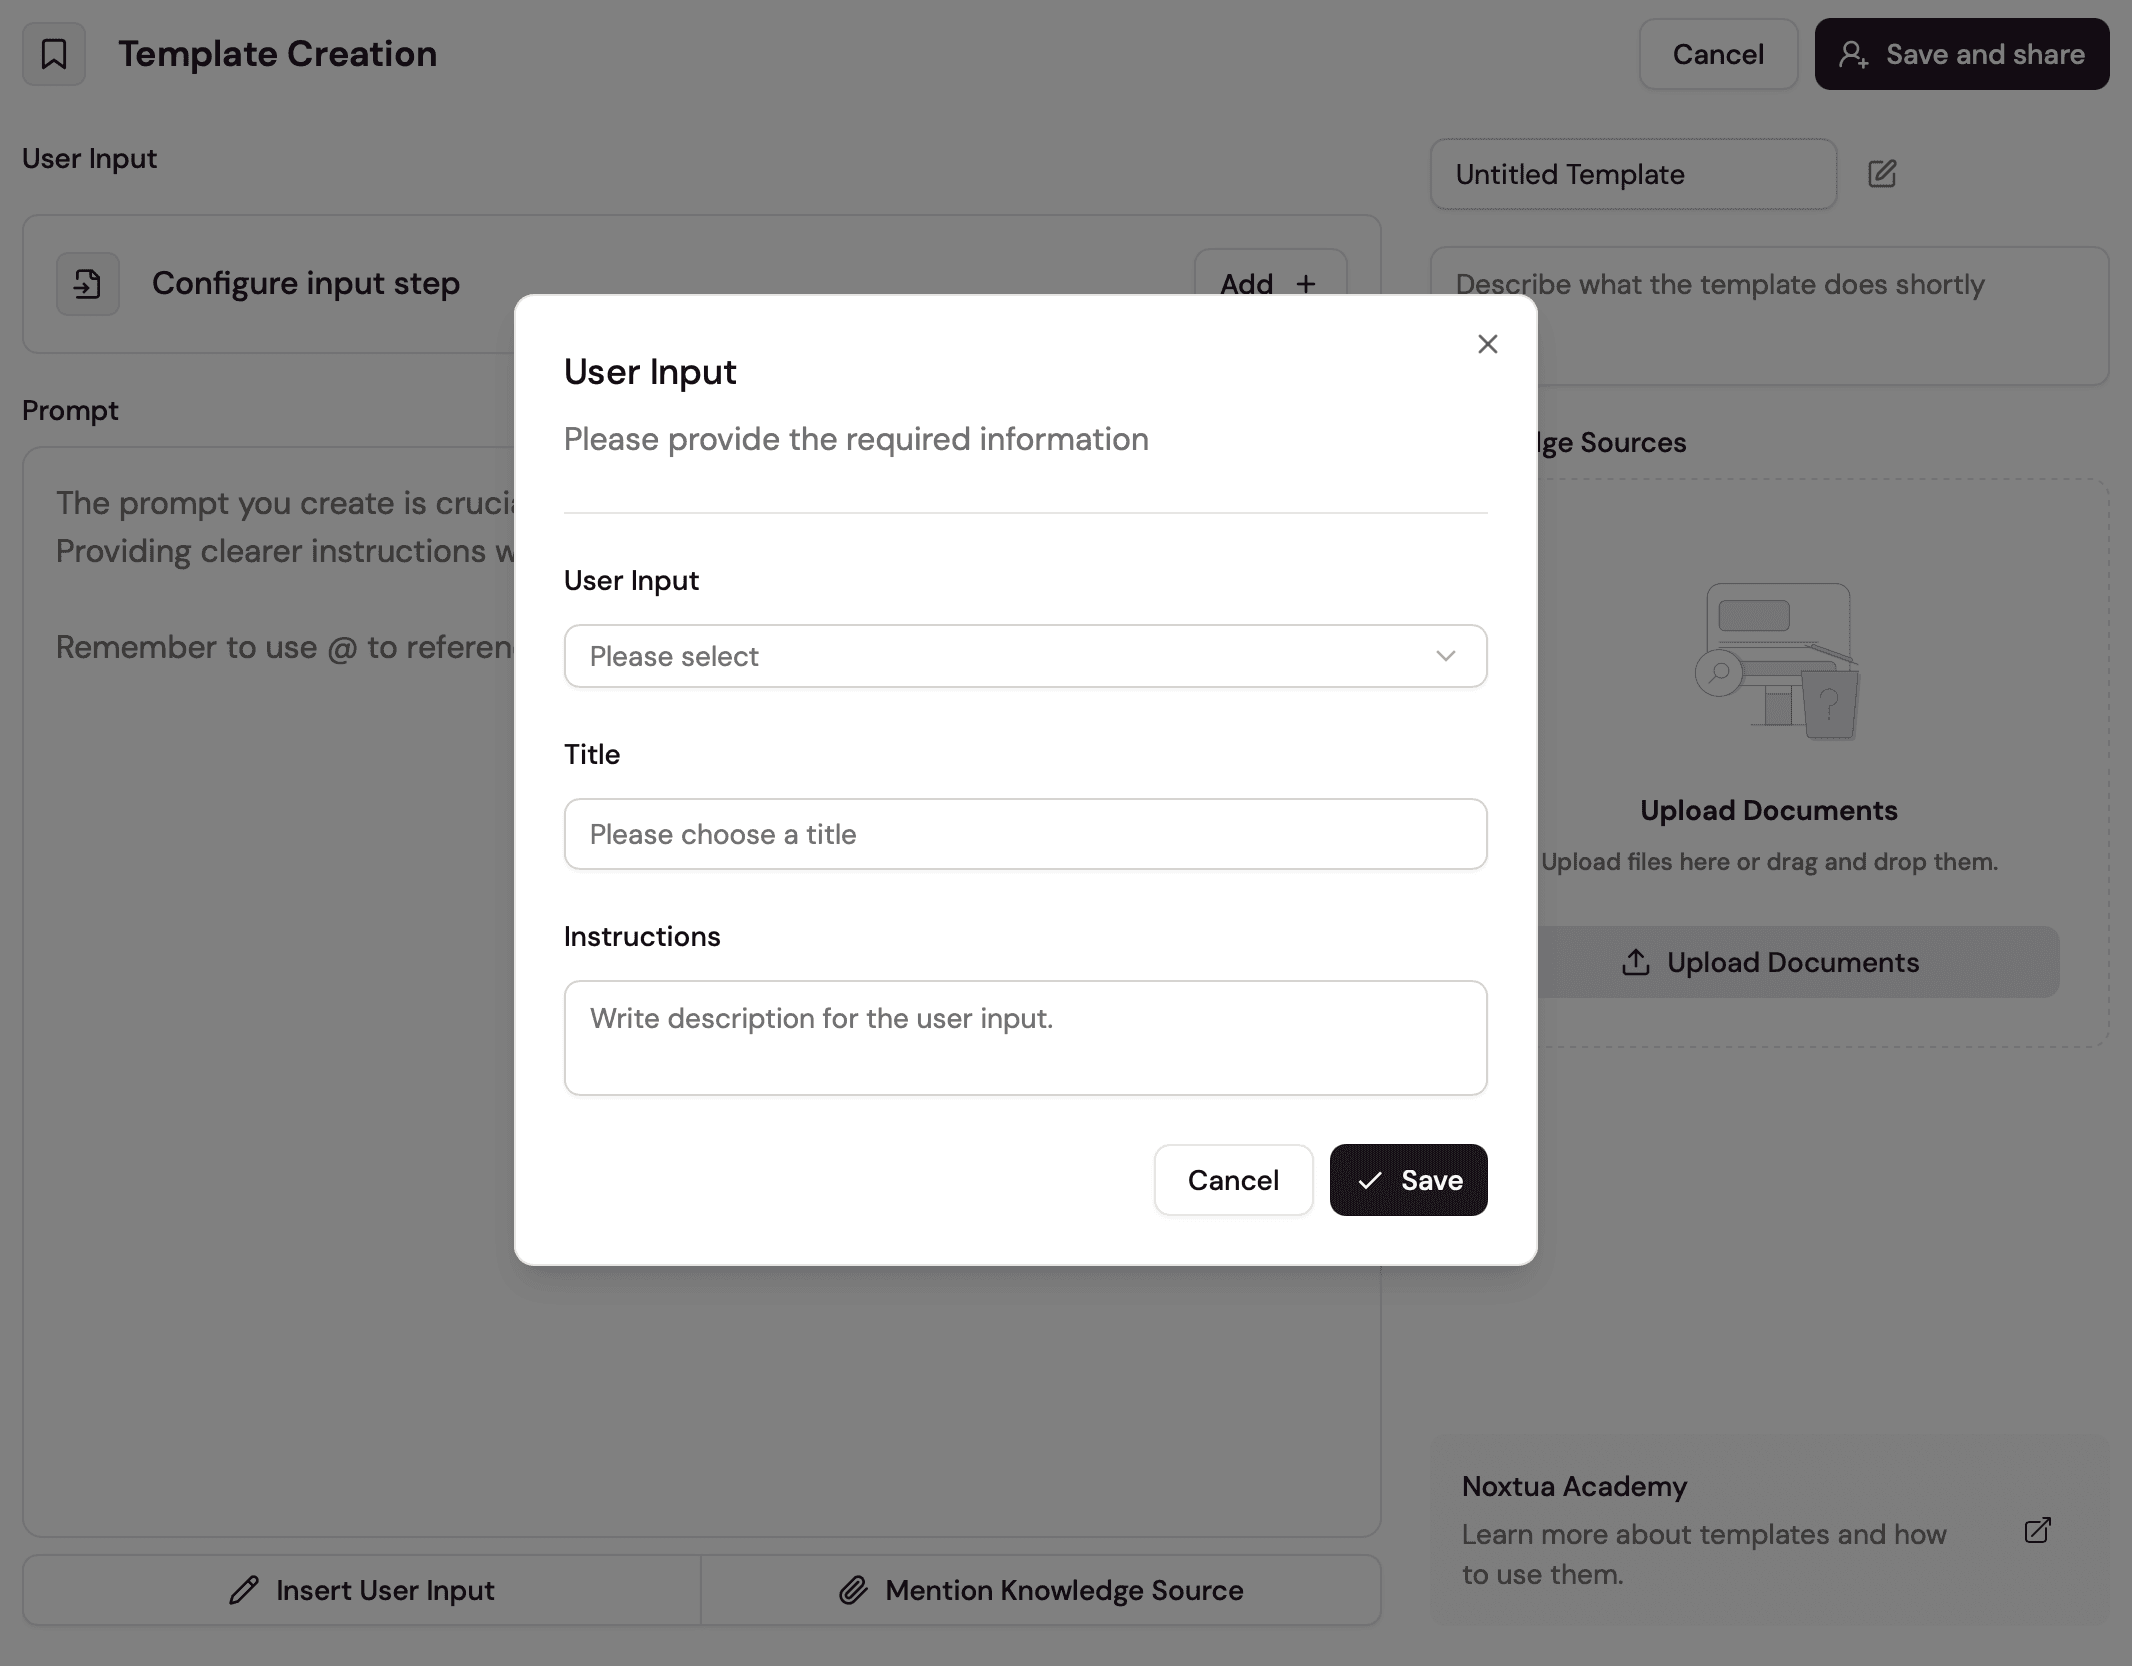
In the “User Input” section on the top left, click the "Add" button to add an input field. A new window opens, asking you to define the following parameters:
User Input: The type of input the user needs to add. Choose between text and file input.
Title: Give the input field a name that clearly tells users what input is required from them.
Instructions: Provide users with more guidance on which input is expected.
Save your configuration and add further input fields as needed for your use case.
Step 5: Add knowledge sources
If your template requires reference documents, such as a checklist, playbook, or review criteria, upload them under "Knowledge Sources” on the right side. These documents are automatically available to Noxtua as guidance whenever the template is run, without users needing to upload them.
Step 6: Add your prompt
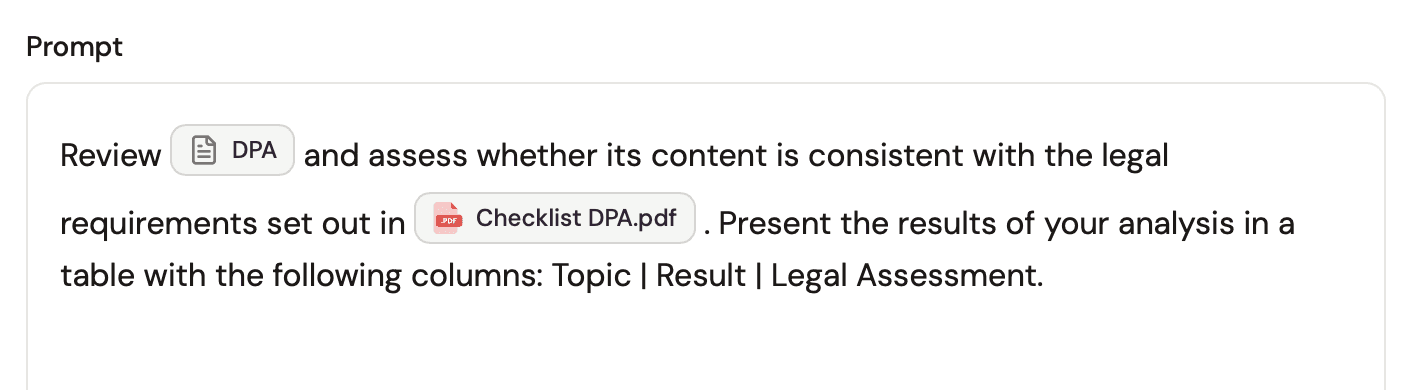
Enter a prompt in the “Prompt” section that serves the use case of your template well.
Now it’s time to add the user inputs and knowledge source documents you defined in earlier steps to your prompt. You have two options:
Type @ in the prompt to open a drop-down for you to select the respective input.
Use the "Insert User Input" and "Mention Knowledge Source" buttons at the bottom of the prompt field.
Step 7: Save and test
Click "Create & Share" to save your template and make it available to other users in your organization. To ensure everything runs as intended, open the chat, select your new template, and run it with realistic input to verify that the output meets your expectations.
Step 8: Edit or delete your template
Of course, you can always go back to your template and edit or delete it at any time. Simply open the template overview again via the chat field, and you will see a button to edit or delete your template.


Dennis Engelhard